It's November, home of my favorite holiday! This month I'm spending a few minutes each day writing about something for which I am thankful. Here is the second batch.

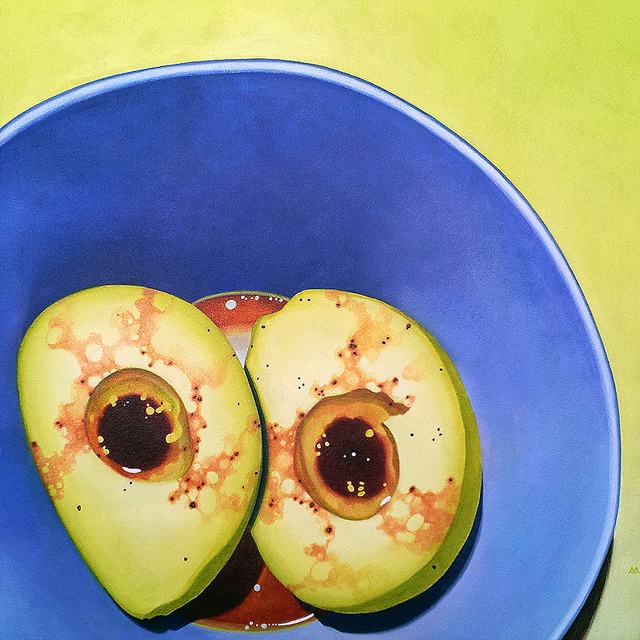
Sushi White Plate, acrylic on canvas, 12 x 12 inches, 2012 by Sarah Atlee. Private collection.
Alyson Stanfield, Art Biz Coach
Do you have a person in your life who believes wholeheartedly in your career? Who cheers your successes? Who's not afraid to ask you to ask yourself the tough questions about what you want out of life? Who can teach you to wield the tools of success? I do: Alyson Stanfield, the Art Biz Coach. Read her book and begin your journey.
My Artist Network
Earlier this month I attended Alyson Stanfield's Art Biz Makeover event in Golden, Colorado. It's not often I get to spend time with such an energetic, motivated group of artists. You know what I love most about working with these folks? Realizing that we're all in this together. We share many of the same challenges, and we celebrate success together. In a business like this, it's so important to know that you are not alone.
The Egg Timer
This friendly little gadget is my near-constant companion in the studio, whether I'm writing, painting, or working on business tasks. It's a tiny piece of decision-making power that allows me to stop asking "What do I do now?"
Looking for more ways to improve your productivity? Check out the Pomodoro Technique, Timeboxing, and Willpower.
![[Benny voice] BRACELETS](http://static1.squarespace.com/static/5829015bbebafb7de3745ee8/585b669b2109d35d63b35db5/585b67f22109d35d63b38041/1482385394073/friendship-bracelets-scan-744x1024.jpg?format=original)
Learning New Things
In 2013 I taught myself how to make friendship bracelets. At the time I was working on a series in response to growing up female in the 80s and 90s. I remember friendship bracelets as these cool things made by cool girls and you had to hope that a cool girl would make one for you, so you could be cool too, but she didn't, so it's a quarter-century later, and now I have the power of the Internet. I AM THE COOL GIRL NOW.
You can be the cool girl, too: Friendship bracelet basics, endless bracelet patterns, how to do anything.
Lists
When I put a task down on paper, that's when it starts to feel real. That's when I make a promise to myself to honor my responsibilities. And while I'm at it, why not have some fun with stickers? My list should be a happy place.

Delegating
You see this beautiful website? See how easy it is to move around and find what you're looking for? Thank Jason Ormand, my rock star web designer.
A long, long time ago, on a server far away, there were iterations of SarahAtlee.com that I coded from the ground up. No more. Web design is not my area of expertise. My time is better spent doing what I do best - making pictures. So I delegate. Try it on, it's so roomy!
Boundaries Around my Creative Time
This is something all artists (really, all independent workers) must face. Making pictures is the most important thing I do. Why on Earth would I want to do dishes or go to the grocery store instead of painting? Because sometimes I let the minutiae of daily life distract me.
All it takes to correct this pattern is giving myself permission to let the small stuff go. After all, is anyone going to remember that I did the dishes today? Nuh-uh. If I use that time to create a beautiful object that a collector brings into their home, that's time well spent.

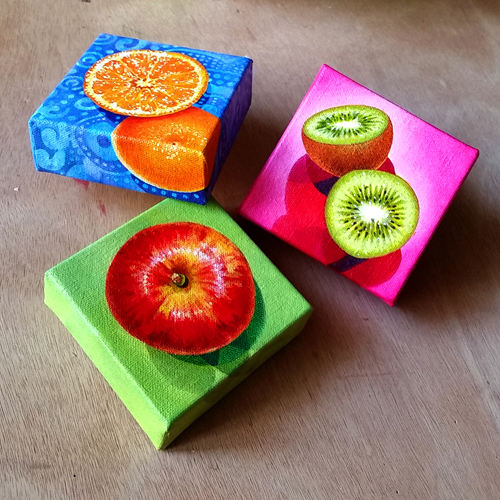
Orange, acrylic on canvas, 4 x 4 inches, 2014 by Sarah Atlee. Private commission.
What are you thankful for? Express your gratitude in the comments below.
Read Coffee, Sleep, Paper - In Gratitude, Part 1
Read Monkeys, Quilts, and Toilet Art - In Gratitude, Part 3
Read It's the Little Things - In Gratitude, Part 4
Read Bonus Gratitude!


![[Benny voice] BRACELETS](http://static1.squarespace.com/static/5829015bbebafb7de3745ee8/585b669b2109d35d63b35db5/585b67f12109d35d63b3803e/1482385393650/friendship-bracelets-scan.jpg?format=original)